
Simple steps to upgrade
Instructions for upgrading Instantsync, Batchsync FTP, and Batchsync Secure FTPS/SFTP versions 2.x, 3.x, and 4.x to Batchsync V12.
Overview
- Upgrading Batchsync on the SAME SERVER you are currently running older version
- Upgrading Batchsync to the NEW SERVER
Upgrade on the same server
Upgrading Batchsync on the SAME SERVER you are currently running older version, and start using your existing sync tasks with V12.
STEP 1. Backup your existing tasks
Before you start with upgrade, create backup copies of your existing tasks.
Copy C:\ProgramData\Sync\*.STF C:\SafePlace
Copy C:\ProgramData\Sync\*.SDB C:\SafePlace
NOTE: By default, your sync tasks are stored in C:\ProgramData\Sync folder. If you have changed default folder (look for your current folder name in old Task Editor > Folder-field under main toolbar), then supply that folder name when doing backups.
NOTE! To make your sync tasks visible in Batchsync V12, you need to copy them to C:\ProgramData\Sync folder, as V12 always loads tasks from that location.
STEP 2. Download and install Batchsync V12
Downloaded version is free for 30 days.
DownloadAfter download completes, run downloaded setup software BatchsyncV12_Setup.exe, it will install Batchsync on your computer.
STEP 3. Start Batchsync V12 CONSOLE
After installation, you'll find Batchsync V12 CONSOLE icon on your Windows desktop. Start CONSOLE. When started, you will see all your old tasks in the main window. Try one of the tasks by running sync preview.
STEP 4. Set default email settings
Click Options-button on main window of Batchsync CONSOLE. Enter default email settings that can be found under Email-tab.
STEP 5. Reschedule tasks
In old Batchsync, scheduling was always done manually using Windows Task Scheduler. These manually scheduled tasks continue work with V12 as is, but they do not display current schedule and running statuses in the new Dashboard. So to get full benefit from the new integrated scheduling features, we recommend that you go to Windows Task Scheduler and disable those tasks.
Scheduling a task in V12 is simple: click Edit Task > Schedule-tab > and select schedule you want for the task. Repeat this for all tasks you want to schedule.
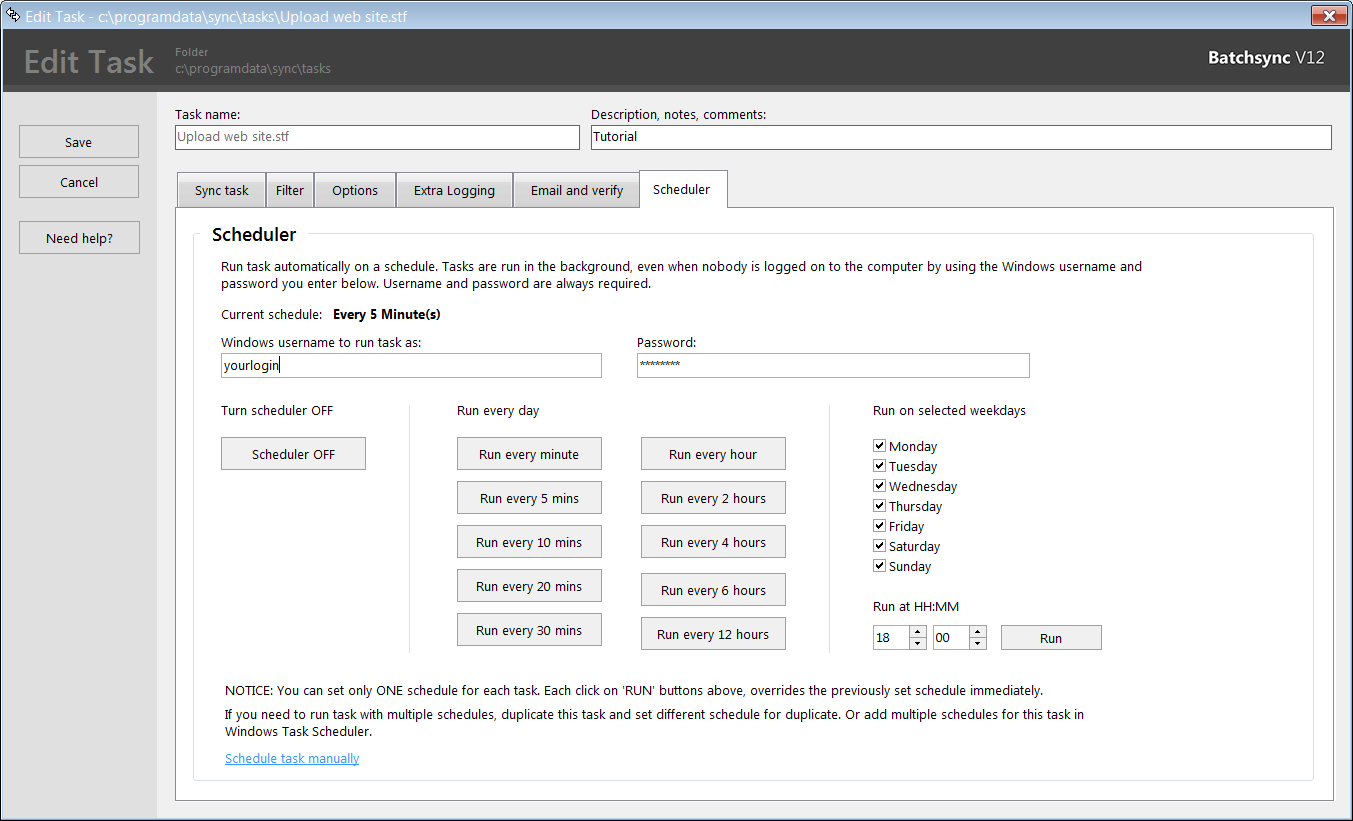
After this you'll see tasks current schedule settings, previous run time, next run time and current status on the main window.
STEP 6. Tasks are now running
Your tasks are now running with new V12.
STEP 7. Subscribe Batchsync V12
You can place order for annual Batchsync V12 subscription here:
Subscribe V12 AnnuallyYou'll receive the unlock key via email immediately after purchase is completed. More about subscriptions here .
Enter unlock key to startup window > Enter Unlock Key > copy & paste key here.
STEP 8. You are done
Upgrade to Batchsync V12 is complete.
Upgrade to the new server
STEP 1. Download and install Batchsync V12
Downloaded version is free for 30 days.
DownloadAfter download completes, run downloaded setup software BatchsyncV12_Setup.exe, it will install Batchsync on your computer.
STEP 2. Copy your existing task to the new server
Copy your existing sync tasks to the new server:
Copy C:\ProgramData\Sync\*.STF \\NEWSERVER\NewServerShare\Tasks
Copy C:\ProgramData\Sync\*.SDB \\NEWSERVER\NewServerShare\Tasks
and from there, to
Copy \\NEWSERVER\NewServerShare\Tasks\*.* C:\ProgramData\Sync\
To make your sync tasks visible in Batchsync V12, you need to copy them to C:\ProgramData\Sync folder, as V12 always loads tasks from that location.
STEP 3. Start Batchsync V12 CONSOLE
After installation, you can find Batchsync V12 CONSOLE icon on your Windows desktop. Start CONSOLE. When started, you will see all your old tasks in the main window. Try one of the tasks by running sync preview.
STEP 4. Set default email settings
Click Options-button on main window of Batchsync CONSOLE. Enter default email settings that can be found under Email-tab.
STEP 5. Schedule tasks
Scheduling a task in V12 is simple: click Edit Task > Schedule-tab > and select schedule you want for the task. Repeat this for all tasks you want to schedule.
After this you'll see tasks current schedule settings, previous run time, next run time and current status on the main window.
STEP 6. Tasks are now running
Your tasks are now running with new V12.
STEP 7. Subscribe Batchsync V12
You can place order for annual Batchsync V12 subscription here:
Subscribe V12 AnnuallyYou'll receive the unlock key via email immediately after purchase is completed. More about subscriptions here .
Enter unlock key to startup window > Enter Unlock Key > copy & paste key here.
STEP 8. You are done
Upgrade to Batchsync V12 is complete.
If you have any questions about upgrading, please let us know, we are happy to help!